What is metadata you ask? Why, it's data about data. Metadata describes how and when and by whom a particular set of data was collected, and how the data is formatted. What does that really mean? Well, it is a listing of information about the item. For example if it's a photograph your metadata might include the name of the camera, the day and time the image was taken, the image name or number, etc.
So, what I want to do is add a title and the source citation to the metadata so it will follow the image around wherever it goes. Basically, this is the modern way to write on the back of the picture. The information will stay with the image.
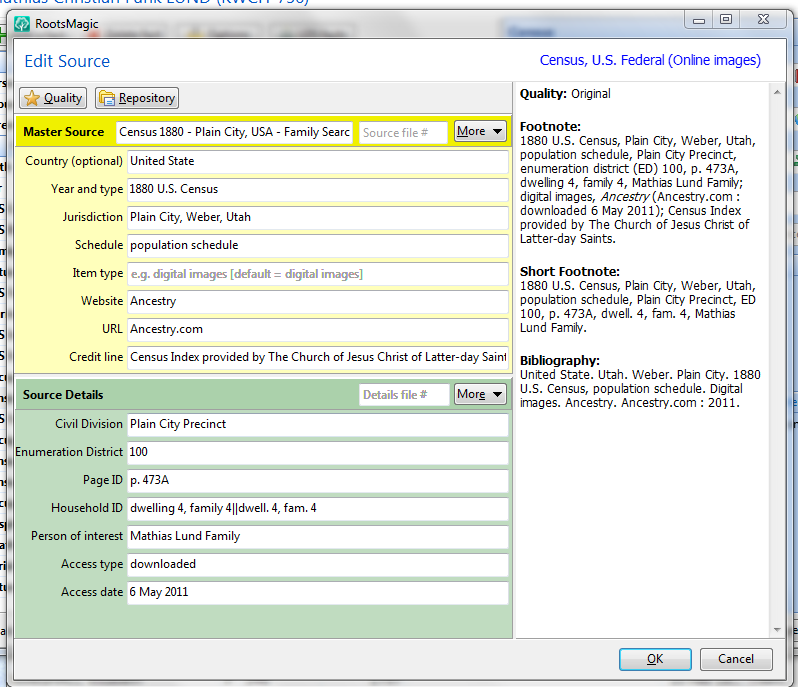
Here's one of my source files for Troy's g-g-grandparents Mathias and Pauline Lund. I have a few records for them including census' and death certificates which are jpg files and a city history which I've saved in word and pdf versions.


There are multiple ways to edit the metadata. You could use something as robust as Photoshop or as basic as just right-clicking the file, choose "Properties" and then the "Details" tab. You can change the data there.

Open the source screen in Roots Magic 4. I used the "footnote" version of the source citation (on the right). I just highlighted it and copied it so I could paste it later.


Now, another thing I can do with this file is save it as a pdf. This makes it really easy to share without having to print. I use cutePDF as the "printer". If you install this program, then cutePDF shows up as a printer option. Then save your file with whatever name you want. Here's the example of Mathias Lund's 1880 Census for you to check out.

This makes it really easy to share documents and make sure the sources go with them.
Wow! This was so helpful, especially with all the screen shots and directions. Thanks!
ReplyDeleteI have done a similar project. I renamed all my docs/photos to start with the last name. this has made organizing and searching so much easier.
ReplyDeleteCheers,
Theresa (Tangled Trees)